PSC Panther Ausf G 1945 Tutorial Pt. 2
It's time to finish the Plastic Soldier Company Panther Ausf G box!
I made an error in painting the barrels red oxide. It turns out the Germans never did this, and painted the barrels in a gunmetal varnish color.
Next I coat the models in a gloss varnish. Airbushing on a 20 psi setting gives a good effect. You need to let this set over night as you don't want any finger printers.
After your varnish is dry, go a head and apply your decals. I myself went very minimal. It's 1945 after all. You want to place your decals with a small brush, and afterward dab the decal with a quetip to remove excess water.
Set the decal with a good solution, dab a little to the decal it should soak in and form a perfect fit to the model. I do this at least twice. Once this has dried twice, I use a small brush and seal the decals with the above gloss varnish.
For the tracks I used a vallejo color called black grey, and the road wheels using dark rubber. Also paint the tools whichever color you think is best. Since I highlight, I use flat brown as a base for wooden tools, and a 50/50 mix of black and gunmetal for the metal parts.
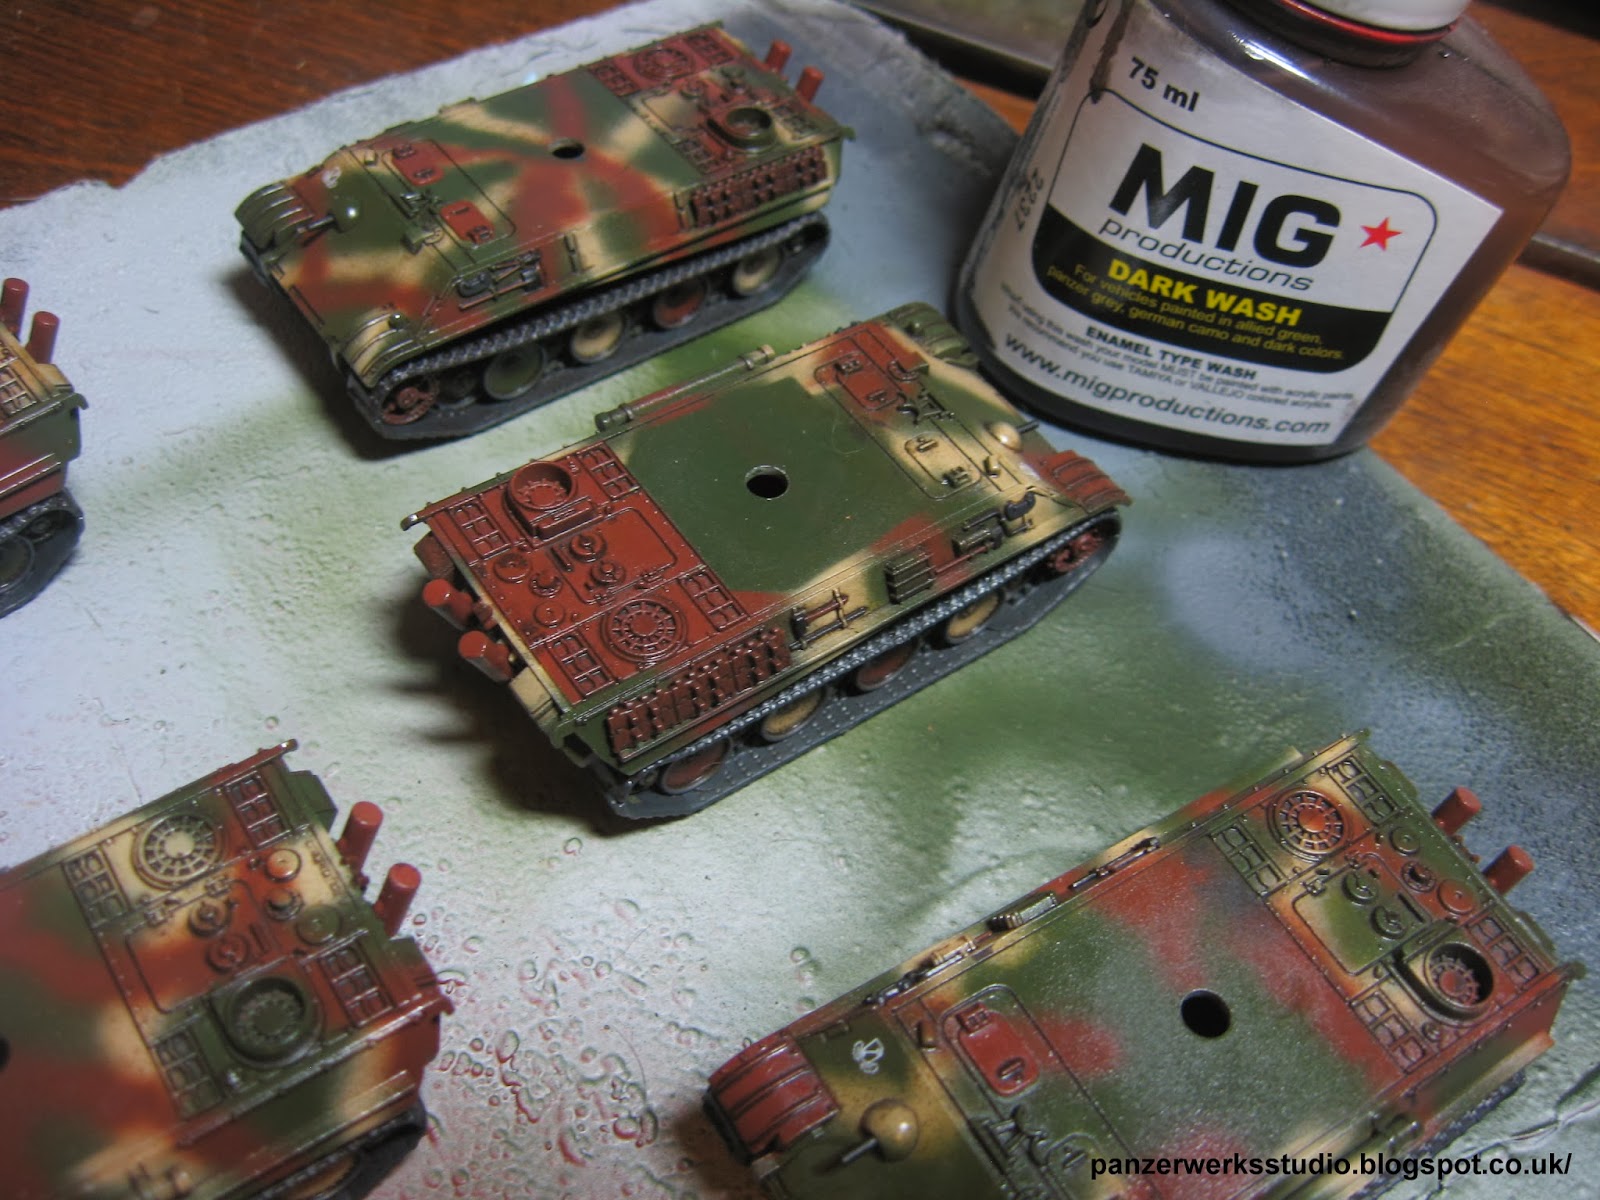
PSC gives us an advantage with their very crisp models. The gloss varnish forms into the model and allows washes to take very very easily. Now grab some mig dark wash, take a small brush and work it the solution into the clear modeled crevices. You also want to apply this to tracks and road wheels.
Allow the wash to dry for 24 hours, using white spirits (or turpentine) wipe off the excess or spill over from the dark wash.
Pretty straight forward, dull coat...kill the shine!
At this stage you should weather and highlight. The tools I'll do a fine line of beige brown, and a german grey/white mix for the tools. Also using a small foam piece dip it into some german grey, and dab it lightly over the model around corners, and areas of heavy use...just remember less is more.
Coat your tracks, and wheels with dark mud. Follow this up with pigment fixer to ensure it stays to the model.
Using a brush dipped in pigment fixer sort of paint the primed red pigment onto the exhaust.
Finally, follow the same technique onto the muffler heads and the gun barrel.
Apply matt varnish, and you're done!


Very very nice indeed!
ReplyDelete